
PowerISO (Activation number included)
Last Updated:10-07-2024, 20:19
How to make bootable usb windows 10 using poweriso
About
Are you ready to upgrade your tech skills? Discover how to effortlessly create a bootable USB for Windows 10 using PowerISO, the ultimate tool for managing your disk images and backups.
Why choose PowerISO? It's simple: PowerISO offers a user-friendly interface and robust features that make the process of creating bootable media a breeze. Whether you're a tech enthusiast or a professional, mastering this skill can save you time and ensure you're always prepared for system updates or fresh installations.
Stay tuned as we guide you through the steps, highlighting the key features of PowerISO that set it apart from other software options. Get ready to enhance your digital toolbox with this essential skill!
Benefits of Using a Bootable USB
Creating a bootable USB drive with PowerISO for Windows 10 offers several advantages that can enhance your computing experience. Below are some of the key benefits:
By leveraging the power of PowerISO to create a bootable USB for Windows 10, you can enjoy these benefits and more. Whether you're a tech enthusiast, a professional, or simply someone looking to streamline your computing setup, a bootable USB drive is a versatile and efficient solution.
Prerequisites for Creating a Bootable USB
1. PowerISO Software: Ensure you have the latest version of PowerISO installed on your computer. This software is essential for creating a bootable USB drive.
2. Windows 10 ISO File: You need a valid Windows 10 ISO file. This file contains all the necessary installation data for Windows 10. Make sure the ISO file is genuine and downloaded from a trusted source.
3. USB Drive: Prepare a USB drive with a minimum capacity of 8GB. It is crucial that the USB drive is empty or contains data you are willing to lose, as the process will erase all existing data on the drive.
4. Administrative Privileges: You must have administrative privileges on your computer to perform the necessary operations. This ensures that you can access and modify system files as required.
5. Backup Important Data: Before starting the process, it is highly recommended to back up any important data from the USB drive to avoid data loss.
Downloading Windows 10 ISO
To create a bootable USB drive for Windows 10 using PowerISO, the first step is to obtain the Windows 10 ISO file. This ISO file serves as the backbone of your installation media and is essential for the successful creation of a bootable USB.
Visit the official Microsoft website to download the Windows 10 ISO file. Microsoft provides a straightforward tool called the Media Creation Tool which simplifies the process of downloading the ISO. This tool is compatible with both Windows and macOS, making it accessible to a wide range of users.
Once on the Microsoft site, select the version of Windows 10 you wish to install, considering factors such as your system requirements and the edition (Home, Pro, etc.). After selecting the appropriate options, the download will begin. Ensure you have a stable internet connection as the ISO file can be quite large, typically ranging from 3GB to 6GB.
After downloading the ISO file, you are ready to proceed with the next steps of creating a bootable USB using PowerISO. Remember to verify the integrity of the downloaded file to avoid any issues during the installation process. This can typically be done by checking the fileâs checksum against the one provided by Microsoft.
Installing PowerISO
PowerISO is a powerful software that allows you to create, edit, and extract ISO files, as well as create bootable USB drives. Here's a step-by-step guide to help you install PowerISO on your computer.
Downloading PowerISO
Before you can install PowerISO, you need to download the installation file. Follow these steps:
Visit the official PowerISO website. Navigate to the download section. Select the version compatible with your operating system. Click the download button to start the download process.Installation Process
Once the download is complete, you can proceed with the installation. Hereâs how:
Congratulations! You have successfully installed PowerISO on your computer. You can now start using it to create bootable USB drives, edit ISO files, and much more.
Creating a Bootable USB with PowerISO
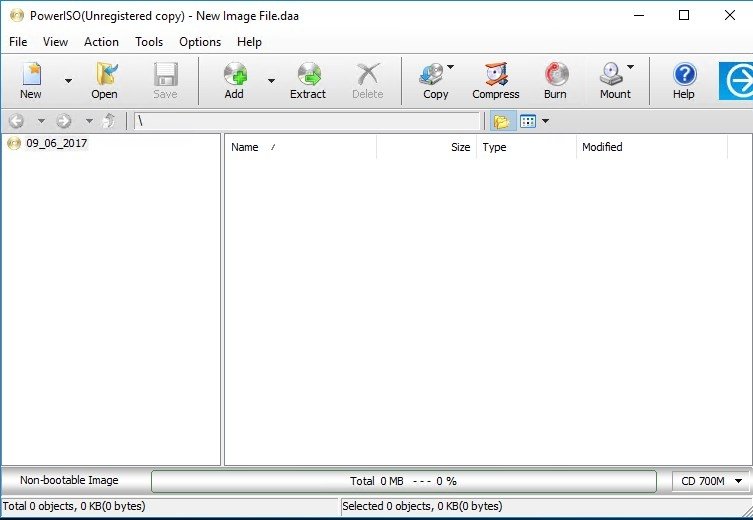
PowerISO is a powerful software that allows you to create, edit, and convert CD/DVD/BD image files. One of its standout features is the ability to create a bootable USB drive, which is incredibly useful for installing or repairing Windows systems. Below, we'll guide you through the steps to create a bootable USB for Windows 10 using PowerISO.
Step 1: Download and Install PowerISO
Before you begin, ensure that you have PowerISO installed on your computer. If you haven't already, you can download it from the official website. Installation is straightforward; follow the on-screen instructions to complete the setup.
Step 2: Prepare Your USB Drive
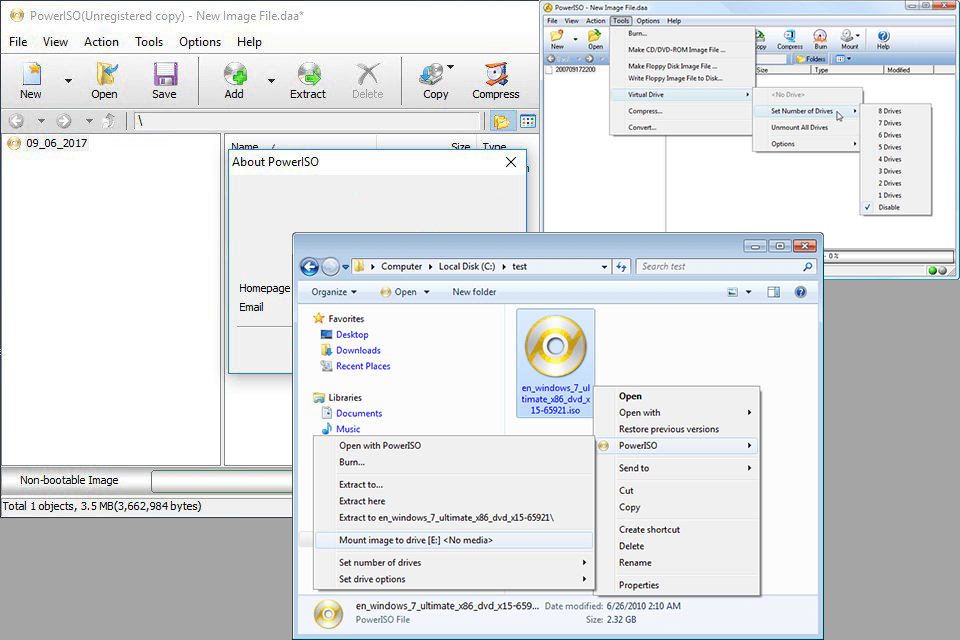
Insert your USB drive into your computer. It's crucial to back up any data on the USB drive beforehand, as the process will erase all existing data. Open PowerISO and select the Tools menu, then click on Create Bootable USB Drive.
In the dialog box that appears, select your USB drive from the drop-down list. Next, click on the Open button to browse for your Windows 10 ISO file. Select the ISO file and then click Start to begin the process. PowerISO will prompt you to confirm the drive selection and acknowledge the data loss; click Yes to proceed.
Note: The process may take several minutes, depending on the speed of your USB drive and computer. Do not interrupt the process once it has started.
Once completed, your USB drive will be ready to boot and install Windows 10. You can now use this bootable USB drive to install Windows on any compatible PC.
Testing the Bootable USB
Congratulations! You've successfully created a bootable USB drive using PowerISO. The next crucial step is to ensure that your USB drive is indeed bootable and functions correctly. Hereâs a step-by-step guide to help you test your bootable USB drive.
Step 1: Restart Your Computer
Begin by restarting your computer. As your system reboots, you need to access the boot menu. This menu allows you to select the device from which you want to boot your computer.
Step 2: Access the Boot Menu
To access the boot menu, press the appropriate key as your computer restarts. Common keys include F10, F12, Delete, or Esc. The specific key depends on your computerâs manufacturer, so check your computerâs manual or startup screen for guidance.
Step 3: Select Your USB Drive
Once youâve accessed the boot menu, select your USB drive from the list of available devices. Use the arrow keys to navigate and press Enter to choose your USB drive.
Step 4: Verify Boot Process
Your computer should now attempt to boot from the USB drive. Observe the process carefully. If the Windows setup screen appears, congratulations! Your bootable USB drive is functioning correctly. If you encounter any errors or the boot process fails, you may need to recreate the bootable USB drive or check for any hardware issues.
Note: Itâs important to test your bootable USB drive on multiple computers if possible, to ensure compatibility and functionality across different systems.
By following these steps, you can ensure that your bootable USB drive is ready for use, whether youâre reinstalling Windows, performing a system recovery, or setting up a new computer. Happy booting!
Troubleshooting Common Issues
Creating a bootable USB drive for Windows 10 using PowerISO is a straightforward process, but users may encounter some common issues. Here are some troubleshooting tips to help you overcome these challenges:
Issue 1: USB Drive Not Recognized
If your computer does not recognize the USB drive, ensure it is properly connected and try a different USB port. If the issue persists, check your device manager to see if the USB drive is listed. If not, you may need to update your USB drivers or try a different USB drive.
Issue 2: PowerISO Fails to Create Bootable Drive
If PowerISO fails to create a bootable drive, make sure you have selected the correct ISO file and that it is not corrupted. Verify the ISO file using a checksum tool to ensure its integrity. Additionally, ensure that you have selected the correct USB drive in the PowerISO interface and that it has sufficient space.
Issue 3: Bootable USB Does Not Boot on Target Machine
If your bootable USB drive does not boot on the target machine, check the BIOS/UEFI settings to ensure that the USB drive is set as the first boot device. Some systems may require you to enable legacy BIOS support or disable secure boot options. Refer to your computerâs manual for specific BIOS/UEFI settings.
Issue 4: USB Drive Formatting Issues
If you encounter issues with formatting the USB drive, ensure that you have formatted it as FAT32. Some large USB drives may need to be formatted using a third-party tool if the built-in Windows formatting tool does not support FAT32 for large drives. Alternatively, you can use the NTFS format, but ensure your BIOS/UEFI supports booting from NTFS.
Issue 5: PowerISO Crashes or Freezes
If PowerISO crashes or freezes during the process, ensure that your system meets the minimum requirements for running the software. Update your operating system and any relevant drivers. If the issue persists, consider reinstalling PowerISO or contacting their support for further assistance.
By addressing these common issues, you can successfully create a bootable USB drive for Windows 10 using PowerISO and ensure a smooth installation process.