PowerISO (Activation number included)
Last Updated:10-07-2024, 20:22
Bootable usb poweriso
About
Revolutionize your data management with PowerISO â the ultimate tool for creating bootable USB drives. Whether you're setting up a new system, recovering from a crash, or simply want to streamline your tech operations, PowerISO has got you covered.
Create, edit, and convert ISO files with ease, and burn them directly to your USB for a seamless boot experience. PowerISO supports a wide range of image file formats, ensuring compatibility with virtually any system.
Don't let system failures hold you back. With PowerISO, you can quickly and efficiently restore your system to its optimal state. Experience the freedom and flexibility of bootable USBs, powered by PowerISO!
Create a Bootable USB with PowerISO
PowerISO is a powerful software that allows you to create, burn, and manage ISO files with ease. One of its standout features is the ability to create bootable USB drives, which can be incredibly useful for installing operating systems, recovering data, or troubleshooting computer issues. Below, we'll guide you through the simple steps to create a bootable USB using PowerISO.
Step 1: Download and Install PowerISO
Before you begin, ensure that you have PowerISO installed on your computer. If you haven't already, you can download it from the official PowerISO website. Follow the installation instructions to set it up on your system.
Step 2: Prepare Your USB Drive
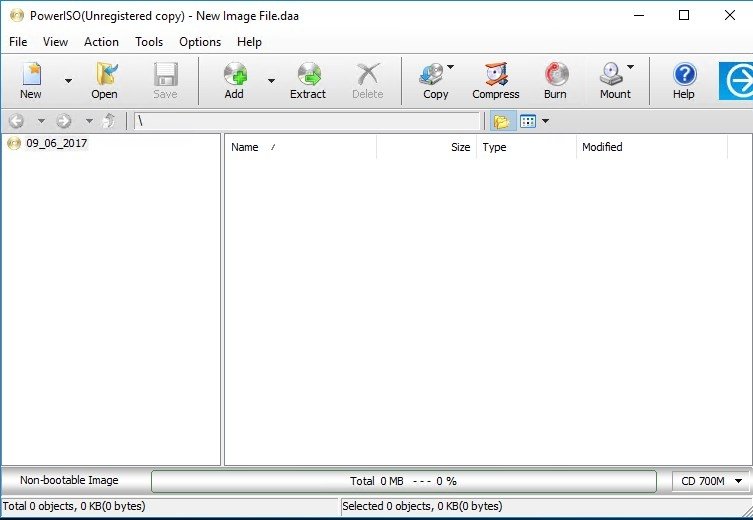
Insert your USB drive into your computer. It's important to note that creating a bootable USB will erase all data on the drive, so make sure to back up any important files beforehand. Open PowerISO, and you should see your USB drive listed in the main interface.
Step 3: Create the Bootable USB
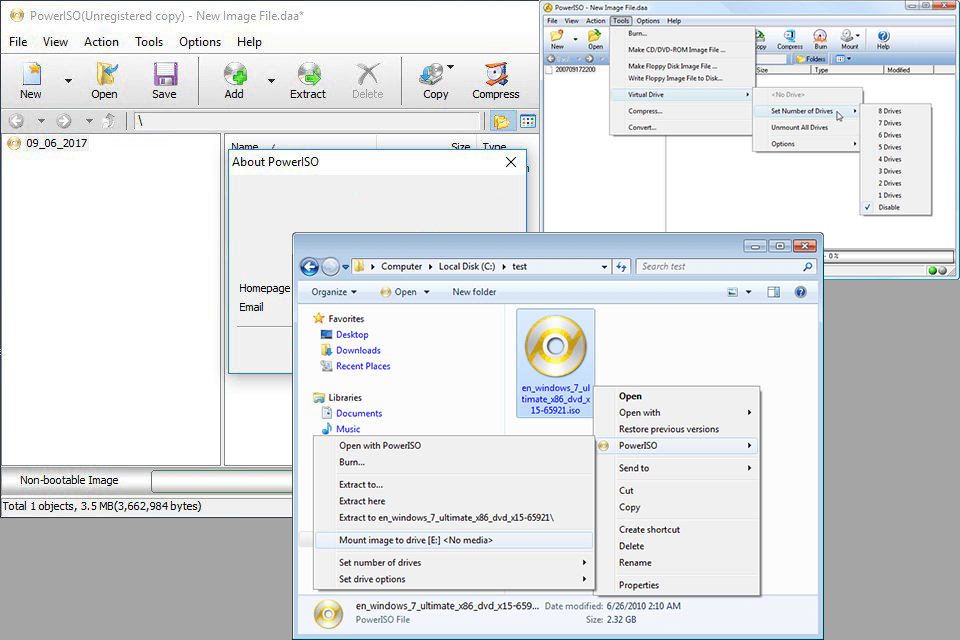
Select the Tools menu and click on Make Bootable USB Drive. In the dialog box that appears, select your USB drive from the drop-down menu. Next, choose the ISO file you want to use for creating the bootable USB. This could be an ISO of an operating system like Windows or Linux, or any other bootable ISO file.
Under the Write Method, you can choose between USB-HDD or USB-ZIP. The USB-HDD method is more commonly used and compatible with most systems. Once you've made your selections, click Start to begin the process. PowerISO will format your USB drive and copy the necessary files to make it bootable.
Step 4: Verify the Bootable USB
After the process is complete, safely eject your USB drive from your computer. To verify that your USB is bootable, you can restart your computer and enter the BIOS or boot menu (usually by pressing a key like F12 during startup) to select your USB drive as the boot device. If everything is set up correctly, your computer should boot from the USB drive, and you can proceed with the intended use, such as installing an operating system or running a diagnostic tool.
Creating a bootable USB with PowerISO is a straightforward process that can save you time and hassle when dealing with system installations or repairs. With its user-friendly interface and robust features, PowerISO is an essential tool for anyone needing to manage ISO files and bootable media.
Benefits of Using PowerISO for Bootable USBs
Effortless Creation and Management
PowerISO is a versatile tool that simplifies the process of creating bootable USB drives. With its user-friendly interface, you can easily select your ISO file and the USB drive, and then create a bootable drive with just a few clicks. This eliminates the need for complex commands or technical know-how, making it accessible to users of all skill levels.
Compatibility and Flexibility
One of the standout features of PowerISO is its wide compatibility with various operating systems and USB drives. Whether you're working with Windows, Linux, or even older systems, PowerISO ensures that your bootable USB will function correctly. Additionally, it supports a wide range of USB formats, giving you the flexibility to use any USB drive you have on hand.
Enhanced Data Security
When dealing with bootable USBs, data security is paramount. PowerISO offers robust encryption and password protection features, ensuring that your sensitive data remains secure. By encrypting your bootable USB, you can prevent unauthorized access and protect your information from potential threats.
Time-Saving Features
Creating a bootable USB can sometimes be a time-consuming process, but PowerISO streamlines this task with its efficient algorithms. The software is optimized for speed, allowing you to create bootable USBs in a fraction of the time it would take with other tools. This time-saving aspect is particularly beneficial for IT professionals and system administrators who need to create multiple bootable drives quickly.
Comprehensive Support and Updates
PowerISO is backed by a dedicated team that provides regular updates and support. This ensures that the software remains up-to-date with the latest technologies and operating systems. Whether you encounter issues or need assistance, the support team is readily available to help you through any challenges you might face.
In conclusion, PowerISO is an indispensable tool for anyone looking to create and manage bootable USBs. Its ease of use, compatibility, data security features, time-saving capabilities, and comprehensive support make it a top choice in the market.
Step-by-Step Guide to Making a Bootable USB
Creating a bootable USB drive with PowerISO is a straightforward process that can save you time and ensure you have a reliable tool for system recovery or installation. Follow this guide to create your bootable USB in just a few steps.
Step 1: Download and Install PowerISO
First, you need to have PowerISO installed on your computer. Visit the official PowerISO website to download the software. Install it by following the on-screen instructions.
Step 2: Prepare Your USB Drive
Insert your USB drive into your computer. Ensure that it does not contain any important data, as the process will format the drive and erase all existing data.
Step 3: Create the Bootable USB
Open PowerISO and select the Tools menu, then click on Make Bootable USB Drive. In the dialog box that appears, select your USB drive from the drop-down menu.
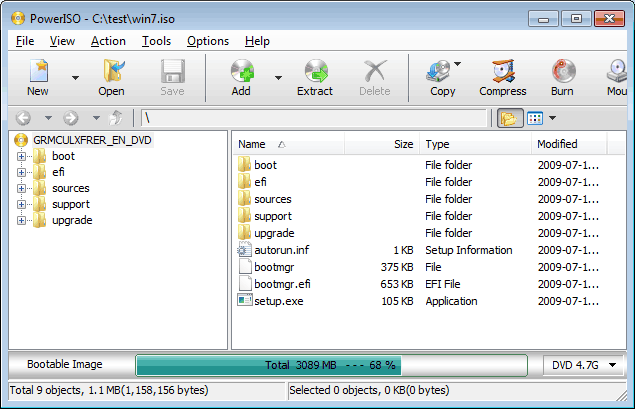
Select the ISO File: Click on the button labeled ... to browse and select the ISO file you want to use. This could be a Windows installation ISO or any other bootable image.
Set the Boot Select: Ensure that the Boot Select option is set to USB-HDD+. This setting optimizes the USB drive for booting.
Start the Process: Click Start to begin the creation of the bootable USB. PowerISO will format the USB drive and copy the necessary files. This process may take several minutes depending on the size of the ISO file.
Step 4: Verify the Bootable USB
Once the process is complete, safely eject your USB drive from your computer. To verify that your USB is bootable, you can restart your computer and enter the BIOS or UEFI settings to change the boot order to prioritize the USB drive.
Note: The steps to enter BIOS or UEFI settings vary depending on your computer's manufacturer. Refer to your computer's manual or support website for specific instructions.
Congratulations! You now have a bootable USB drive ready for use. Whether for system recovery, installing a new OS, or other bootable applications, your USB drive is now a versatile tool in your tech arsenal.
Compatibility and System Requirements for PowerISO
PowerISO is a versatile tool that allows you to create, burn, mount, and edit ISO files. Whether you're looking to create a bootable USB drive or manage your disk images, understanding the compatibility and system requirements is crucial for a smooth experience. Below, we outline the key aspects you need to consider.
Supported Operating Systems
PowerISO is compatible with a wide range of operating systems, ensuring that users across different platforms can benefit from its features. Here are the supported OS:
Windows 11 Windows 10 Windows 8.1 Windows 7 Windows Vista Windows XPSystem Requirements
To run PowerISO efficiently, your system should meet the following minimum requirements:
Processor: 1 GHz Intel or AMD CPU RAM: 128 MB Free Hard Disk Space: 60 MB Display: 800x600 monitor resolution Administrator Permissions: Required for installation and certain operationsFor optimal performance, especially when dealing with large ISO files or performing complex tasks, it is recommended to have a system with higher specifications than the minimum requirements.
Troubleshooting Common Issues with Bootable USBs
Creating a bootable USB drive using PowerISO is a straightforward process, but sometimes users encounter issues that prevent their USB from booting properly. Here are some common problems and their solutions to help you troubleshoot and resolve them efficiently.
Issues with Creating the Bootable USB
If you're having trouble creating a bootable USB, consider these potential issues and solutions:
Corrupted ISO File: Ensure that your ISO file is not corrupted. Re-download the file if necessary and verify its integrity using a checksum. Incorrect USB Drive Selection: Double-check that you have selected the correct USB drive in PowerISO. Incorrect selection can lead to formatting the wrong drive. Insufficient Permissions: Make sure you have administrative privileges to write to the USB drive. Running PowerISO as an administrator can resolve permission-related issues.Issues with Booting from the USB
Once your USB is created, booting from it can also present its own set of challenges:
BIOS/UEFI Settings: Ensure that your computer's BIOS/UEFI is set to boot from USB. Access your BIOS/UEFI settings during startup and change the boot order. USB Drive Compatibility: Some older systems may not support booting from USB 3.0 drives. Try using a USB 2.0 drive if possible. Damaged USB Drive: If the USB drive is physically damaged, it may not boot correctly. Test the drive on another computer to confirm its functionality.By addressing these common issues, you can significantly improve the success rate of creating and using a bootable USB with PowerISO. If problems persist, consider seeking help from the PowerISO support forums or consulting the detailed documentation provided by PowerISO.
Advantages of Bootable USBs Over Other Media
Speed and Efficiency: One of the most significant advantages of using a bootable USB drive, such as those created with PowerISO, is the speed and efficiency it offers. Unlike traditional optical discs or floppy disks, USB drives have much faster read and write speeds. This means that booting up a system or installing an operating system from a USB drive is considerably quicker, saving you valuable time.
Durability and Reliability
Bootable USBs are known for their durability and reliability. They are less prone to physical damage compared to optical discs, which can easily get scratched or broken. Additionally, USB drives do not suffer from the same data degradation issues that can affect magnetic tapes or older storage media. This ensures that your bootable USB will remain functional and reliable for a longer period.
Portability and Convenience
Another major advantage of bootable USBs is their portability and convenience. USB drives are compact and lightweight, making them easy to carry around. You can store multiple bootable images on a single drive and switch between them as needed. This flexibility is particularly useful for IT professionals or tech enthusiasts who need to work with different systems or troubleshoot various issues.
In conclusion, bootable USBs offer a range of benefits that make them a superior choice over other media types. From their speed and efficiency to their durability and portability, USB drives created with PowerISO provide a reliable and convenient solution for booting and installing operating systems.
How to Update Your Bootable USB with PowerISO
Updating your bootable USB with PowerISO is a straightforward process that ensures your USB drive remains up-to-date with the latest software and operating systems. Whether you're preparing for a system recovery or setting up a new OS installation, PowerISO makes the update process seamless and efficient. Hereâs a step-by-step guide to help you through the process:
Step 1: Download and Install PowerISO
If you haven't already, download PowerISO from the official website and install it on your computer. Ensure you have the latest version for the best performance and compatibility.
Step 2: Prepare Your USB Drive
Insert your USB drive into your computer. Open PowerISO and select the USB drive from the drop-down menu in the main interface. Make sure to back up any important data on the USB drive as the update process will erase all existing data.
Step 3: Select the ISO File
Click on the Open button in PowerISO to browse and select the ISO file you want to use for updating your bootable USB. This could be a new version of an operating system or a different bootable image.
Step 4: Create the Bootable USB
Once the ISO file is selected, click on the Burn button. PowerISO will prompt you to confirm the drive selection and the ISO file. Click Yes to start the burning process. This step may take several minutes depending on the size of the ISO file and the speed of your USB drive.
Step 5: Verify the Bootable USB
After the burning process is complete, safely eject your USB drive and reinsert it to ensure it is recognized as a bootable device. You can verify this by restarting your computer and entering the BIOS/UEFI to check if the USB drive appears in the boot menu.
Note: Always ensure your computer supports booting from USB drives and that the boot order is correctly set in the BIOS/UEFI settings.
By following these steps, you can easily update your bootable USB with PowerISO, ensuring you have the latest tools and systems ready for any computing needs.
Customer Reviews and Success Stories
Discover why thousands of users around the globe trust Bootable USB PowerISO for their data management and bootable USB creation needs. Here are some of the testimonials and success stories from our satisfied customers:
John M., IT Specialist: I've been using Bootable USB PowerISO for all my bootable USB needs. It's incredibly easy to use and has saved me countless hours in setting up recovery drives. The support team is also top-notch, always ready to help with any questions I have. Emily R., Freelance Developer: As someone who frequently needs to install different operating systems, Bootable USB PowerISO has been a game-changer. The ability to create bootable USBs quickly and reliably has made my job so much easier. Highly recommend it! Michael T., Tech Enthusiast: I've tried several tools for creating bootable USBs, but none compare to Bootable USB PowerISO. It's user-friendly, feature-rich, and the customer reviews are spot on. It's now my go-to tool for any bootable USB tasks.Here are some specific success stories that highlight the versatility and effectiveness of Bootable USB PowerISO:
Emergency Recovery: When Sarah's computer crashed unexpectedly, Bootable USB PowerISO helped her quickly create a recovery drive, allowing her to restore her system without losing any data. It was a lifesaver, she says. Multi-OS Installation: David, a software tester, needed to install multiple operating systems on different machines. Bootable USB PowerISO made this process seamless, enabling him to create bootable USBs for various OS installations efficiently. Teaching Tool: Professor Linda uses Bootable USB PowerISO to prepare lab computers for her IT classes. It's an essential tool for setting up our lab environments quickly and reliably, she notes.Join the thousands of satisfied users who have made Bootable USB PowerISO an integral part of their digital toolkit. Whether you're an IT professional, a developer, or a tech enthusiast, you'll find Bootable USB PowerISO to be an invaluable asset.