PowerISO (Activation number included)
Last Updated:10-07-2024, 20:21
How to use poweriso to make bootable usb
About
Are you ready to transform your ordinary USB drive into a powerful bootable tool? With PowerISO, creating a bootable USB has never been easier. Whether you're a tech enthusiast, a system administrator, or simply someone looking to recover or install a new operating system, mastering the art of making a bootable USB can be a game-changer.
In this guide, we'll walk you through the simple steps of using PowerISO to create a bootable USB drive. Stay tuned as we delve into the details that will help you harness the full potential of your USB drive!
Downloading and Installing PowerISO
PowerISO is a powerful tool that allows you to create, edit, and convert CD/DVD/BD image files. Whether you're looking to make a bootable USB drive or manage your disk images, PowerISO has you covered. Follow these simple steps to download and install PowerISO on your computer.
Step 1: Download PowerISO
To get started, you need to download the PowerISO installer. Visit the official PowerISO website and navigate to the download section. Choose the version that is compatible with your operating system (Windows, Mac, or Linux). Click on the download link to start the process.
Note: Ensure that you download the software from the official site to avoid any potential security risks.
Step 2: Install PowerISO
Once the download is complete, locate the installer file on your computer. Double-click on the file to begin the installation process. Follow the on-screen instructions to proceed. You may be prompted to choose the installation directory and agree to the terms and conditions.
Tip: It's recommended to keep the default installation settings unless you have specific requirements.
After agreeing to the terms, click on the Install button. The installation process will take a few minutes to complete. Once done, you will see a confirmation message indicating that PowerISO has been successfully installed on your system.
Now that PowerISO is installed, you can start using it to create bootable USB drives, extract ISO files, and perform various other tasks related to disk image management.
Preparing Your USB Drive
Before you can create a bootable USB drive using PowerISO, it's essential to prepare your USB drive properly. This process involves formatting the drive and ensuring it's ready for the installation of your bootable files. Follow these steps to get your USB drive ready for action.
Step 1: Backup Your Data
First and foremost, ensure that you have backed up any important data on your USB drive. Formatting the drive will erase all its contents, so it's crucial to save any necessary files to another location before proceeding.
Step 2: Format Your USB Drive
To format your USB drive, follow these steps:
Insert your USB drive into your computer. Open 'My Computer' or 'This PC' to view your drives. Right-click on the USB drive and select 'Format...'. Choose the file system (NTFS is recommended for better compatibility). Ensure the 'Quick Format' option is checked for a faster process. Click 'Start' to begin the formatting process. A warning will pop up, confirming that all data will be erased. Click 'OK' to proceed. Once the formatting is complete, click 'OK'.Your USB drive is now ready to be used with PowerISO to create a bootable USB. Remember, a properly formatted drive ensures smooth and error-free operations during the creation of your bootable USB.
Creating a Bootable ISO Image
Creating a bootable ISO image is a crucial step in preparing a USB drive for system recovery or installation. With PowerISO, this process is streamlined and user-friendly. Below, we'll guide you through the steps necessary to create a bootable ISO image that can be used to boot up your computer in case of system failures or for fresh installations.
Prerequisites
PowerISO installed on your computer An ISO file of the operating system or bootable software A USB drive with at least 4GB of storageSteps to Create a Bootable ISO Image
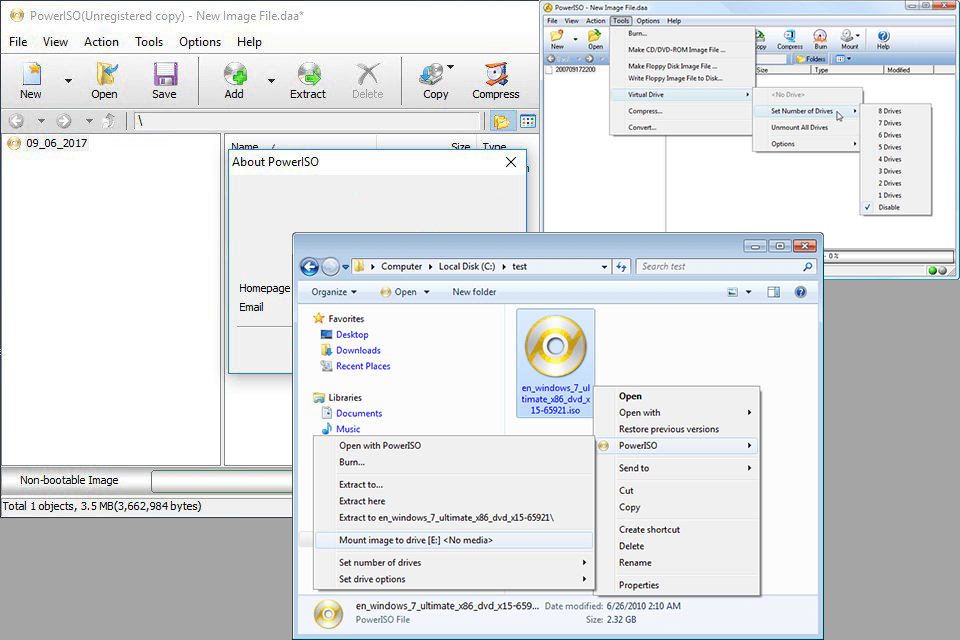
Open PowerISO and select the 'Tools' menu. Choose 'Create Bootable USB Drive' from the dropdown options. In the dialog box, click on the 'Browse' button to select your ISO file. Insert your USB drive into the computer if it isn't already connected. Select your USB drive from the 'Drive' dropdown menu. Ensure the 'Create a bootable disk using' option is set to 'USB-HDD+'. Click 'Start' to begin the process. PowerISO will format the USB drive and copy the ISO content onto it. Wait for the process to complete. A confirmation message will appear once the bootable USB drive is ready.By following these steps, you will have successfully created a bootable ISO image on your USB drive using PowerISO. This bootable USB drive can now be used to boot and install operating systems or perform system repairs on any compatible computer.
Using PowerISO to Make a Bootable USB
Creating a bootable USB drive is a crucial skill for anyone looking to install or recover operating systems. PowerISO simplifies this process, making it accessible even for beginners. Hereâs a step-by-step guide on how to use PowerISO to make a bootable USB.
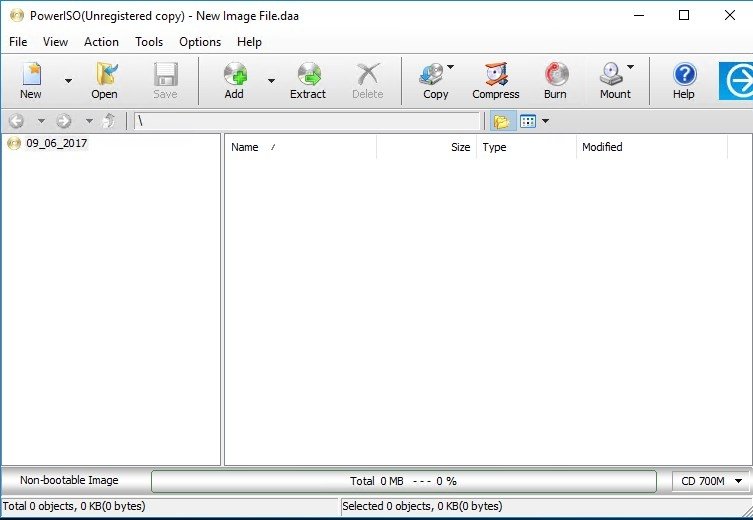
First, download and install PowerISO from the official website. Ensure you have the correct version compatible with your operating system. Once installed, launch the application.
Insert your USB drive into your computer. Itâs important to note that this process will erase all data on the USB, so make sure to back up any important files beforehand.
In PowerISO, select the Tools menu and click on Make Bootable USB Drive. A new window will appear prompting you to select the USB drive and the ISO file you want to use. Choose the appropriate USB drive from the dropdown menu and browse to the location of your ISO file.
Next, youâll need to specify the bootable option. PowerISO provides several options such as USB-HDD, USB-ZIP, and more. Select the one that best suits your needs. Typically, USB-HDD is the most common choice.
Once all settings are configured, click Start to begin the process. PowerISO will format the USB drive and copy the necessary files to make it bootable. This might take several minutes depending on the size of the ISO file.
After the process is complete, youâll have a fully functional bootable USB drive ready for use. You can now use this USB to boot up any compatible computer and install or recover the operating system as needed.
Using PowerISO to create a bootable USB is straightforward and efficient. With this tool, you can ensure that youâre always prepared for system installations or recoveries, making it an essential utility for tech enthusiasts and professionals alike.
Testing Your Bootable USB
Once you've successfully created a bootable USB drive using PowerISO, it's crucial to test it to ensure it functions correctly. This section will guide you through the steps to test your bootable USB and verify its functionality.
Initial Boot Test
The first step in testing your bootable USB is to perform an initial boot test. Follow these steps:
Insert your bootable USB drive into the USB port of the computer you want to test it on. Restart the computer. During the boot process, press the key that opens the boot menu (commonly F12, F2, or Esc, depending on your computer's manufacturer). Select your USB drive from the boot menu options. Observe if the system boots from the USB drive correctly.Functionality Check
After confirming that your USB drive boots successfully, the next step is to check its functionality. This involves ensuring that all the necessary files and programs on the USB drive are accessible and operational.
By following these steps, you can ensure that your bootable USB drive is fully functional and ready for use in various scenarios, such as system recovery or installing a new operating system.
Troubleshooting Common Issues
While using PowerISO to create a bootable USB, you might encounter some common issues. This section provides solutions to help you troubleshoot and resolve these problems efficiently.
If you continue to experience issues after trying these solutions, consider reaching out to PowerISO support for further assistance. Remember to provide detailed information about the problem to expedite the troubleshooting process.