PowerISO (Activation number included)
Last Updated:10-07-2024, 20:19
How to use poweriso to make a bootable usb
About
Are you ready to transform your ordinary USB drive into a powerful bootable tool? With PowerISO, creating a bootable USB has never been easier or more efficient. Whether you're a tech enthusiast, a professional, or just someone looking to enhance your digital toolkit, this guide will walk you through the simple steps to achieve this.
First, ensure you have PowerISO installed on your computer. If not, you can download it from the official website. Once installed, follow these straightforward steps:
Step 1: Launch PowerISO and select the 'Tools' menu.
Step 2: Click on 'Make Bootable USB' to start the process.
Step 3: Choose the USB drive you want to convert and select the ISO file you wish to use.
Step 4: Click 'Start' and let PowerISO do the magic. In just a few moments, your USB drive will be ready to boot any system!
Don't miss out on the convenience and versatility that a bootable USB drive offers. With PowerISO, you're just a few clicks away from enhancing your digital capabilities. Try it today and see the difference!
Downloading and Installing PowerISO
PowerISO is a powerful tool that allows you to create, edit, and convert CD/DVD/BD image files. It also enables you to make a bootable USB drive, which is essential for installing operating systems or running recovery tools. Hereâs a step-by-step guide on how to download and install PowerISO on your computer.
Visit the Official Website: Open your web browser and go to the official PowerISO website. Download PowerISO: On the homepage, you will find a download link. Click on the Download button to start the download process. Choose the version that is compatible with your operating system (Windows, Mac, or Linux). Install PowerISO: Once the download is complete, locate the downloaded file (usually in your Downloads folder). Double-click on the installer file to start the installation process. Follow the on-screen instructions to complete the installation. You may need to agree to the terms and conditions and choose the installation directory. Launch PowerISO: After installation, you can launch PowerISO by double-clicking the PowerISO icon on your desktop or by finding it in your Start menu (for Windows) or Applications folder (for Mac). Register PowerISO (Optional): If you have purchased a license, you can register PowerISO by entering your registration code in the provided field within the application.Congratulations! You have successfully downloaded and installed PowerISO. You can now start using it to create bootable USB drives, edit ISO files, and perform other disk image operations.
Preparing Your USB Drive
Step 1: Insert Your USB Drive
Before you begin, ensure your USB drive is inserted into your computer. PowerISO will detect the drive and allow you to select it for the bootable process.
Step 2: Backup Important Data
Important: Creating a bootable USB drive will format the drive, erasing all existing data. Make sure to backup any important files before proceeding.
Step 3: Open PowerISO
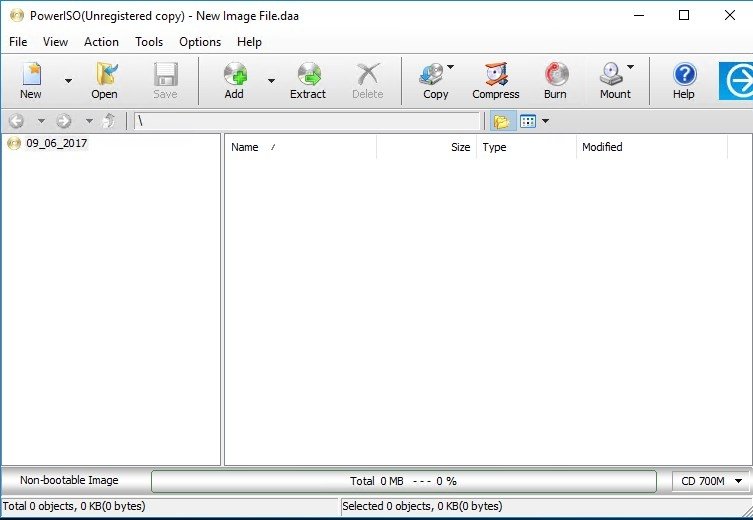
Launch PowerISO from your desktop or start menu. The interface will open, providing you with various options to manage your ISO files and USB drives.
Step 4: Select the USB Drive
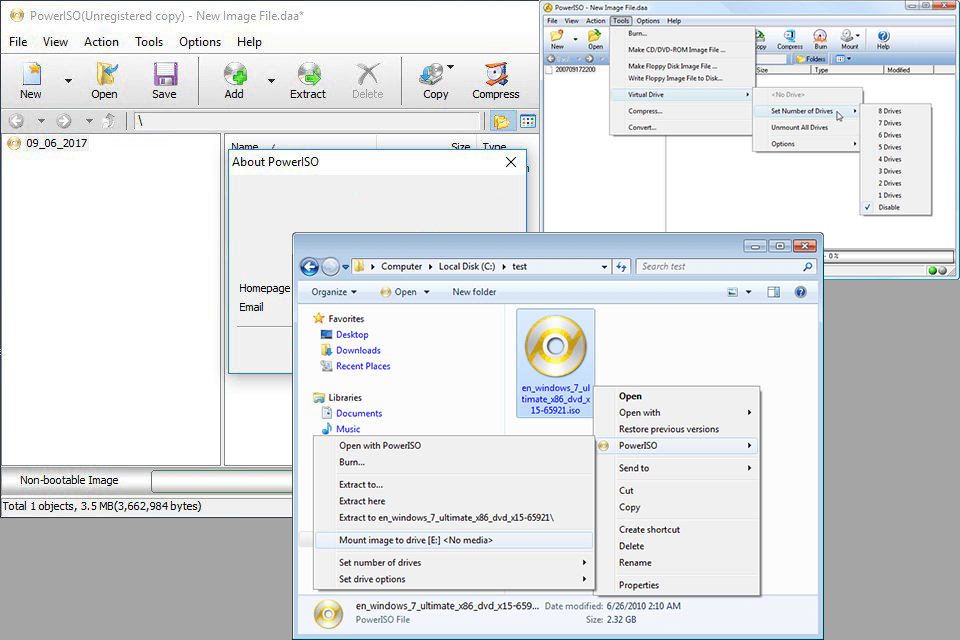
In the PowerISO interface, navigate to the Tools menu and select Make Bootable USB Drive. A new window will appear, prompting you to select the USB drive from a drop-down list. Choose your inserted USB drive.
Step 5: Choose the ISO File
Click on the Browse button to locate and select the ISO file you wish to use for creating the bootable USB. Ensure the ISO file is correct to avoid any issues during the boot process.
Step 6: Start the Process
Once the USB drive and ISO file are selected, click on the Start button to begin the formatting and writing process. This may take several minutes depending on the size of the ISO file and the speed of your USB drive.
Step 7: Verify the Bootable USB
After the process completes, safely eject the USB drive from your computer. To verify that the USB is bootable, you can insert it into a different computer and attempt to boot from it.
Creating a Bootable ISO Image
Creating a bootable ISO image is a crucial step in setting up a bootable USB drive, especially for system recovery or installing operating systems. With PowerISO, this process is streamlined and user-friendly, making it accessible even for beginners.
Step 1: Prepare Your ISO File
Before you start, ensure you have the ISO file of the operating system or software you wish to install. This file should be legitimate and compatible with your system. If you don't have an ISO file, you can download one from the official website of the operating system or software provider.
Step 2: Open PowerISO and Create Bootable Image
Launch PowerISO on your computer. Navigate to the Tools menu and select Create Bootable ISO File. This will open a new window where you can configure the settings for your bootable ISO image. Here, you need to:
Select the source ISO file: Browse and choose the ISO file you prepared. Choose the output directory: Select where you want to save the new bootable ISO file. Set the bootable information: Ensure that the bootable information is correctly set according to your system requirements.After setting all the necessary options, click on OK to start the process. PowerISO will create the bootable ISO image, which you can then use to make a bootable USB drive.
By following these steps, you can efficiently create a bootable ISO image using PowerISO, setting the stage for a smooth installation or recovery process on your computer.
Using PowerISO to Format the USB Drive
Formatting your USB drive is a crucial step before making it bootable. PowerISO provides a straightforward way to format your USB drive, ensuring it is ready for the next steps in creating a bootable USB. Follow these simple steps to format your USB drive using PowerISO.
Step-by-Step Guide to Formatting with PowerISO
Launch PowerISO: Open the PowerISO application on your computer. Select the USB Drive: From the toolbar, click on the Tools menu and select Format. Choose the Drive: In the Format window, select your USB drive from the drop-down list of drives. Set the File System: Choose the desired file system. For most bootable USBs, FAT32 is recommended. Start Formatting: Click the Start button to begin the formatting process. Confirm any prompts that appear. Wait for Completion: The formatting process may take a few minutes depending on the size of the USB drive. Do not remove the USB drive during this process.Tips for Successful Formatting
Backup Data: Ensure you have backed up any important data on the USB drive before formatting, as this process will erase all existing data. Check Compatibility: Verify that the file system you choose is compatible with the operating system you plan to use with the bootable USB. Keep PowerISO Updated: Regularly update PowerISO to the latest version to ensure access to the latest features and improvements.By following these steps and tips, you can easily format your USB drive using PowerISO, setting the stage for creating a reliable and efficient bootable USB drive.
Writing the ISO to the USB Drive
Once you have your ISO file ready and a USB drive at hand, the next crucial step is to write the ISO to the USB drive to make it bootable. This process involves using PowerISO, a powerful tool that simplifies the creation of bootable USB drives. Below, we'll guide you through the steps required to achieve this.
Preparing Your USB Drive
Before you start, ensure that your USB drive is properly formatted and has enough space to accommodate the ISO file. It's also advisable to backup any data on the USB drive as the process will erase all existing data.
Using PowerISO to Write the ISO
Step 1: Launch PowerISO on your computer. The interface is user-friendly, making it accessible even for beginners.
Step 2: Click on the Tools menu and select Make Bootable USB Drive. This option is crucial as it will initiate the process of making your USB drive bootable.
Step 3: In the dialog box that appears, select the ISO file you wish to write to the USB drive. Use the Browse button to navigate to the location of your ISO file.
Step 4: Choose the USB drive from the drop-down menu. Make sure you select the correct drive to avoid data loss on other drives.
Step 5: Click Start to begin the writing process. PowerISO will handle the rest, copying the ISO file to the USB drive and making it bootable.
The process might take several minutes depending on the size of the ISO file and the speed of your USB drive. Do not interrupt the process once it has started.
Once completed, your USB drive will be ready to boot your system. You can now use it to install operating systems, run recovery tools, or perform any other tasks that require a bootable drive.
Verifying the Bootable USB Drive
Once you have successfully created a bootable USB drive using PowerISO, it is crucial to verify that it works correctly. This ensures that your USB drive is ready for use in booting your computer or installing an operating system. Follow the steps below to verify your bootable USB drive.
By following these steps, you can ensure that your bootable USB drive is functioning as expected. This verification process is essential for avoiding issues during the actual boot or installation process.
Troubleshooting Common Issues
While using PowerISO to create a bootable USB, you might encounter some common issues. Below are some of the most frequent problems and their solutions to help you troubleshoot effectively.
If you continue to face issues, consider checking the PowerISO forums or contacting their customer support for further assistance. Ensuring your software is updated to the latest version can also resolve many common problems.