Movavi Screen Recorder (Activation number included)
Last Updated:8-07-2024, 00:52
Movavi screen recorder tutorial
About
Discover the Easiest Way to Capture Your Screen with our comprehensive Movavi Screen Recorder Tutorial. Whether you're looking to record webinars, gameplay, or create video tutorials, our step-by-step guide will walk you through the process effortlessly.
Learn how to set up your recordings, edit your captures, and share your videos with ease. With Movavi, you can enhance your productivity and creativity without any hassle.
Don't miss out on this opportunity to master screen recording. Start your journey with Movavi Screen Recorder Tutorial today and transform the way you share your digital experiences!
Key Features of Movavi Screen Recorder
Discover the powerful capabilities of Movavi Screen Recorder that make it a top choice for capturing your screen. Whether you're a professional or a casual user, our software offers a range of features designed to enhance your recording experience.
High-Quality Screen Capture: Record your screen in high resolution to ensure that every detail is captured clearly. Perfect for creating tutorials, webinars, or gameplay videos. Easy-to-Use Interface: Our intuitive interface makes it simple for anyone to start recording right away. No technical skills required! Customizable Recording Area: Select the exact area of your screen you want to record. Choose between full screen, selected windows, or custom regions. Audio Recording Options: Capture system audio, microphone input, or both simultaneously. Perfect for adding voiceovers or recording music. Real-Time Editing: While recording, you can add text, shapes, and highlights to emphasize important points. This feature is ideal for educational content and presentations. Scheduled Recordings: Set up recordings to start and stop automatically at specified times. Great for capturing live streams or online events. Instant Sharing: Quickly share your recordings on social media, YouTube, or save them directly to your device in various formats. Low Resource Usage: Enjoy smooth recordings without slowing down your computer. Movavi Screen Recorder is optimized to use minimal system resources.With Movavi Screen Recorder, you have the tools to create professional-quality videos effortlessly. Try it today and see how it can enhance your content creation process!
How to Install Movavi Screen Recorder
Installing Movavi Screen Recorder is a straightforward process that ensures you can start capturing your screen in no time. Follow these simple steps to get the software up and running on your computer.
Step 1: Download the Installer
Begin by visiting the official Movavi website. Navigate to the Screen Recorder section and click on the Download button. This will initiate the download of the installer file, which is typically named something like movavi_screen_recorder_setup.exe for Windows or movavi_screen_recorder_setup.dmg for Mac.
Step 2: Run the Installer
Once the download is complete, locate the installer file in your Downloads folder. Double-click on it to start the installation process. If you're on Windows, you might see a User Account Control prompt asking for permission to make changes to your computer. Click Yes to continue.
For Mac users, you may need to drag the Movavi Screen Recorder icon to the Applications folder as part of the installation process.
Step 3: Follow the Installation Wizard
The installation wizard will guide you through the remaining steps. On Windows, you'll see a setup window where you can choose the installation directory and additional options like creating a desktop shortcut. Click Install to begin the installation. Mac users will simply need to follow the on-screen instructions to complete the installation.
Wait for the installation to finish. This usually takes just a few minutes.
Step 4: Launch Movavi Screen Recorder
After the installation is complete, you can launch Movavi Screen Recorder by double-clicking its icon on your desktop (if you created a shortcut) or by finding it in your list of applications. The first time you run the program, you might be prompted to enter your license key or start a free trial.
Congratulations! You've successfully installed Movavi Screen Recorder. Now you're ready to start recording your screen with ease.
Basic Recording Steps with Movavi
Welcome to the world of effortless screen recording with Movavi Screen Recorder! Whether you're looking to capture gameplay, create tutorials, or record video calls, our intuitive software makes it simple. Follow these basic steps to get started on your recording journey.
Step 1: Install and Launch Movavi Screen Recorder
Begin by downloading the Movavi Screen Recorder from our official website. Once the download is complete, install the software by following the on-screen instructions. After installation, launch the application to access its user-friendly interface.
Step 2: Configure Recording Settings
Before you start recording, take a moment to configure your settings. Click on the 'Settings' icon to adjust preferences such as audio sources, video quality, and output format. Ensure that both the audio and video settings are set according to your needs, especially if you're planning to record voice commentary or system sounds.
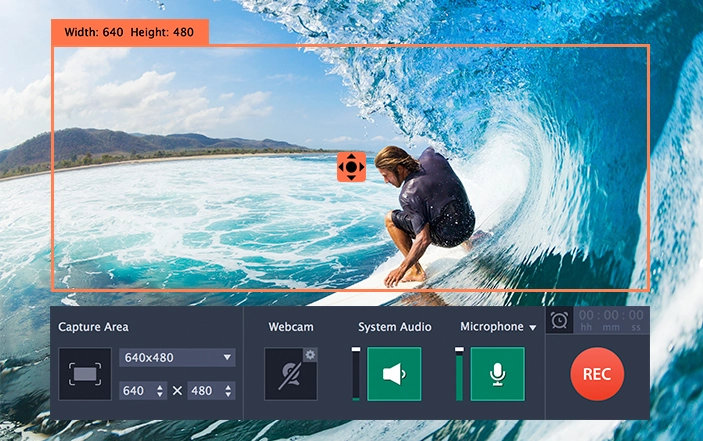
Step 3: Select the Recording Area
Movavi Screen Recorder allows you to choose the specific area of the screen you wish to capture. You can select the entire screen, a custom window, or a specific region. Use the toolbar options to define your recording area precisely.
Step 4: Start Recording
Once everything is set up, click the 'REC' button to begin recording. You can pause or stop the recording at any time using the on-screen controls. Additionally, Movavi Screen Recorder offers a handy countdown timer to ensure you're ready to start when the recording begins.
Step 5: Review and Save Your Recording
After you've finished recording, preview your video to check the quality and content. If satisfied, save your recording in your preferred format. Movavi Screen Recorder supports various formats, making it easy to share your videos on different platforms or devices.
With these simple steps, you're well on your way to becoming a pro at screen recording with Movavi. Start capturing your screen today and share your experiences with the world!
Advanced Settings and Customization
Unlock the full potential of your screen recording with Movavi Screen Recorder's advanced settings and customization options. Whether you're capturing gameplay, creating tutorials, or recording webinars, these features will help you tailor your recordings to perfection.
Customize Audio Settings
Enhance your recordings with precise audio control. Adjust the microphone volume to ensure your voice is clear and audible, or mute it entirely if you're recording without commentary. You can also select specific audio sources to capture, ensuring that only the sounds you want are included in your video.
Fine-Tune Video Quality
Movavi Screen Recorder allows you to fine-tune video quality settings to match your needs. Choose from various resolutions and frame rates to optimize your recording for different platforms and devices. Whether you need high-definition video for professional presentations or a smaller file size for easy sharing, you can adjust these settings to achieve the perfect balance.
With these advanced settings and customization options, Movavi Screen Recorder empowers you to create professional-quality recordings that stand out. Start exploring these features today and take your screen recordings to the next level!
Editing Recorded Videos with Movavi
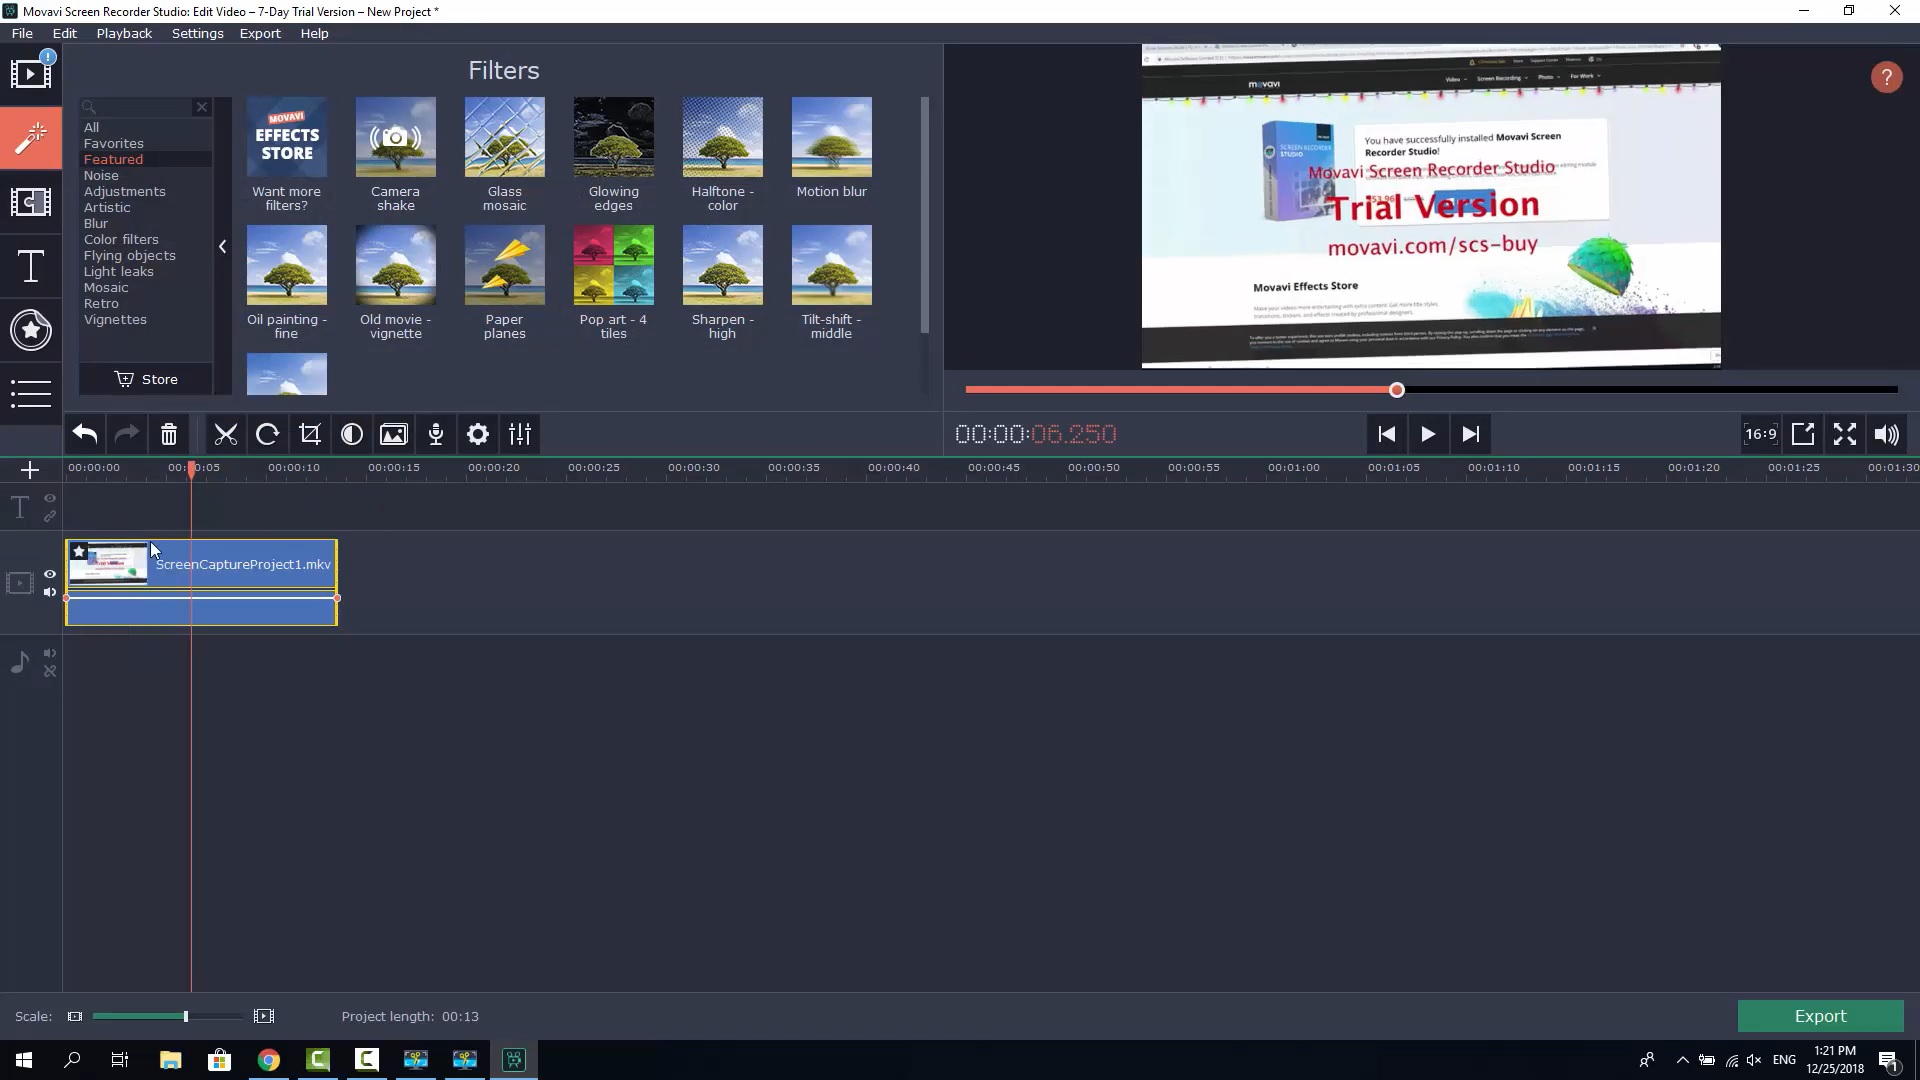
Once you've captured your screen with Movavi Screen Recorder, the next step is to enhance and edit your recordings to make them more engaging and professional. Here's how you can use Movavi's editing tools to polish your videos:
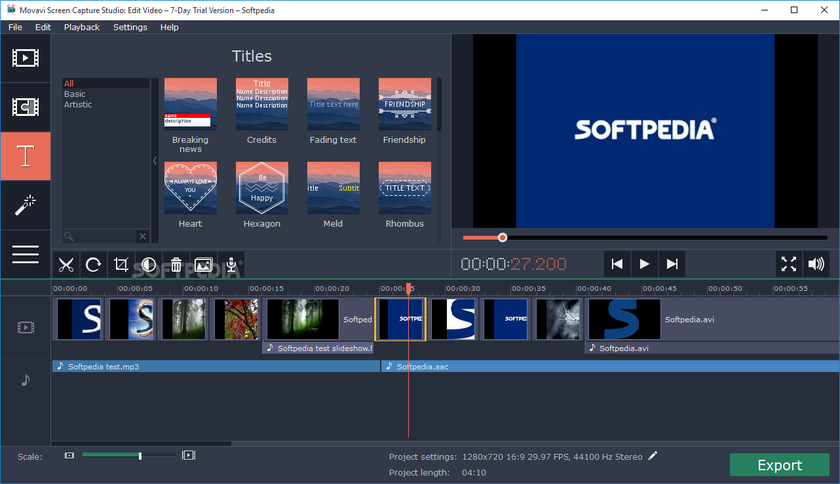
Trim and Cut: Remove unwanted parts from your video with ease. Simply select the start and end points of the segment you want to keep. Add Audio Tracks: Enhance your video with background music or voiceovers. Movavi allows you to import audio files and sync them perfectly with your video. Insert Text: Add captions, titles, or subtitles to make your video more informative and accessible. Choose from a variety of fonts, sizes, and colors. Apply Effects: Make your video stand out with special effects. From transitions to filters, Movavi offers a range of options to add a creative touch. Adjust Video Quality: Fine-tune the brightness, contrast, and saturation to ensure your video looks its best.Heres a step-by-step guide to editing your recorded videos with Movavi:
Import Your Video: Open Movavi and load the screen recording you want to edit. Trim or Cut: Use the timeline to select and remove any unnecessary parts of your video. Add Audio: Import your chosen audio file and place it on a separate audio track. Insert Text: Click on the text tool and drag it to the desired location on your video. Apply Effects: Explore the effects library and apply any that suit your videos theme. Adjust Quality: Use the editing tools to tweak the visual settings for optimal viewing. Export Your Video: Once satisfied, export your edited video in your preferred format and quality settings.With Movavi, editing your recorded videos is straightforward and enjoyable. Whether you're creating tutorials, presentations, or personal vlogs, Movavi's editing features will help you produce high-quality content that captivates your audience.
Tips for Effective Screen Recording
Screen recording can be a powerful tool for sharing information, creating tutorials, or capturing important moments on your screen. Here are some tips to help you make the most of your screen recording sessions using Movavi Screen Recorder.
By following these tips, you can create professional and engaging screen recordings that effectively communicate your message. Whether you're teaching a new software feature, demonstrating a process, or capturing a live event, Movavi Screen Recorder is your go-to tool for high-quality screen recordings.
Troubleshooting Common Issues
Issue 1: Recording Stops Unexpectedly
If your recording session ends abruptly, it might be due to insufficient system resources. Ensure that your computer meets the minimum requirements for running Movavi Screen Recorder. Close unnecessary applications to free up RAM and CPU usage. Additionally, check your recording settings and reduce the frame rate or resolution if necessary.
Issue 2: No Sound in Recordings
A common issue users face is the absence of sound in their recordings. First, verify that your microphone and speakers are properly connected and functioning. Next, open the Movavi Screen Recorder settings and check that the correct audio input and output devices are selected. If you're using external software to enhance sound, ensure it is not muting or distorting the audio feed.
Issue 3: Video and Audio Out of Sync
Syncing issues between video and audio can be frustrating. This problem often arises due to inconsistent frame rates or audio sampling rates. To resolve this, try recording at a lower frame rate and ensure that the audio sampling rate matches the recommended settings in Movavi Screen Recorder. Additionally, avoid using multiple audio enhancement tools simultaneously during recording.
Issue 4: Poor Video Quality
If your recorded videos appear pixelated or blurry, the issue might be related to the recording resolution or compression settings. Ensure that the recording resolution matches your screen resolution. Adjust the compression settings to a higher quality level in the Movavi Screen Recorder preferences. Also, make sure that your graphics drivers are up to date to avoid any hardware-related issues.
Issue 5: Unable to Save or Export Recordings
If you encounter difficulties saving or exporting your recordings, check the file path settings in Movavi Screen Recorder. Ensure that you have selected a valid and accessible location on your drive. If the issue persists, try restarting the application and your computer. Make sure you have sufficient disk space and that your antivirus software is not blocking the save operation.
Remember, troubleshooting these common issues can significantly enhance your recording experience with Movavi Screen Recorder. Should you need further assistance, refer to the comprehensive user manual or reach out to our support team for help.