Movavi Screen Recorder (Activation number included)
Last Updated:8-07-2024, 00:52
How to activate movavi screen recorder
About
Are you ready to take your screen recording to the next level? With Movavi Screen Recorder, you can capture anything on your screen with ease and precision. Whether you're recording a tutorial, gameplay, or a video call, our software ensures high-quality results every time.
But how do you activate this powerful tool? Follow these simple steps to get started:
1. Download and Install: First, download the Movavi Screen Recorder from our official website. Install it on your computer by following the on-screen instructions.
2. Launch the Application: Once installed, launch the Movavi Screen Recorder. You'll be greeted with a user-friendly interface designed to make recording a breeze.
3. Enter Your Activation Code: To unlock all the features, you'll need an activation code. Enter the code you received upon purchase in the designated field and click 'Activate'.
4. Start Recording: That's it! You're now ready to start recording. Use the intuitive controls to customize your recording settings and capture your screen like a pro.
Don't miss out on the opportunity to enhance your screen recording experience with Movavi Screen Recorder. Activate now and see the difference!
System Requirements for Movavi Screen Recorder
Before you dive into capturing your screen with Movavi Screen Recorder, ensure your system meets the necessary requirements to guarantee smooth and efficient recording. Below, you'll find detailed specifications tailored for both Windows and macOS users.
Windows System Requirements
macOS System Requirements
Meeting these requirements will ensure that Movavi Screen Recorder operates seamlessly on your device, allowing you to capture high-quality screen recordings without any performance issues. Whether you're recording for educational purposes, creating tutorials, or capturing gameplay, Movavi Screen Recorder is designed to deliver outstanding results on systems that meet these specifications.
Downloading Movavi Screen Recorder
Get Started with Movavi Screen Recorder Capture your screen effortlessly with Movavi Screen Recorder. Whether you're looking to record gameplay, create tutorials, or capture video calls, our user-friendly software has got you covered. Heres how you can download and start using Movavi Screen Recorder today.
Step 1: Visit the Official Website Begin by navigating to the official Movavi website. Ensure you are on the correct page to avoid any potential scams or malware.
Step 2: Choose Your Version Select the version of Movavi Screen Recorder that suits your needs. We offer both free and premium versions, with the premium version including additional features and no watermark on your recordings.
Step 3: Click on the Download Button Once youve chosen your version, click the Download button. The installer will start downloading to your computer.
Step 4: Install the Software After the download is complete, open the installer file. Follow the on-screen instructions to install Movavi Screen Recorder on your device. Make sure to read the terms and conditions and choose the installation settings that best fit your preferences.
Step 5: Launch Movavi Screen Recorder Once installed, you can launch the software directly from your desktop or start menu. Start exploring its features and settings to customize your recording experience.
Why Choose Movavi Screen Recorder? With its intuitive interface and powerful capabilities, Movavi Screen Recorder is designed to make screen capturing simple and effective. From high-quality recordings to easy editing tools, its the perfect solution for anyone looking to share their screen content with the world.
Download Movavi Screen Recorder today and transform the way you capture and share your digital life!
Installing Movavi Screen Recorder
Welcome to the easy-to-follow guide on installing Movavi Screen Recorder! Whether you're a seasoned tech user or a beginner, this step-by-step process will ensure you get the software up and running smoothly on your device.
Step 1: Download the Installer
To start, navigate to the official Movavi website and locate the Screen Recorder product page. Click on the 'Download' button to initiate the download of the installer file. Ensure you have enough space on your hard drive, as the file size is typically small.
Step 2: Run the Installer
Once the download is complete, locate the installer file in your downloads folder. Double-click on it to run the installer. You may be prompted to allow the program to make changes to your device; click 'Yes' to continue.
Note: If you encounter any issues during the download or installation process, make sure your internet connection is stable and that your system meets the minimum requirements for running Movavi Screen Recorder.
Follow the on-screen instructions provided by the installer. It will guide you through the necessary steps, including agreeing to the terms and conditions and choosing the installation directory. For most users, the default settings are recommended.
After completing these steps, the installation will finalize, and you will be ready to start using Movavi Screen Recorder. Launch the program from your desktop or start menu to begin capturing your screen!
Launching Movavi Screen Recorder
Welcome to the world of effortless screen recording with Movavi Screen Recorder! Whether you're looking to capture gameplay, create tutorials, or record video calls, our user-friendly software has got you covered. Heres a step-by-step guide to help you launch and start using Movavi Screen Recorder effectively.
Step-by-Step Setup
Download and Install: Begin by downloading the Movavi Screen Recorder from our official website. Follow the installation prompts to set it up on your computer. Launch the Application: Once installed, find the Movavi Screen Recorder icon on your desktop or in your applications menu and click to open it. Configure Settings: Before you start recording, take a moment to configure your preferences. Adjust the audio settings, choose the output format, and set up hotkeys for easy control during recording.Key Features to Explore
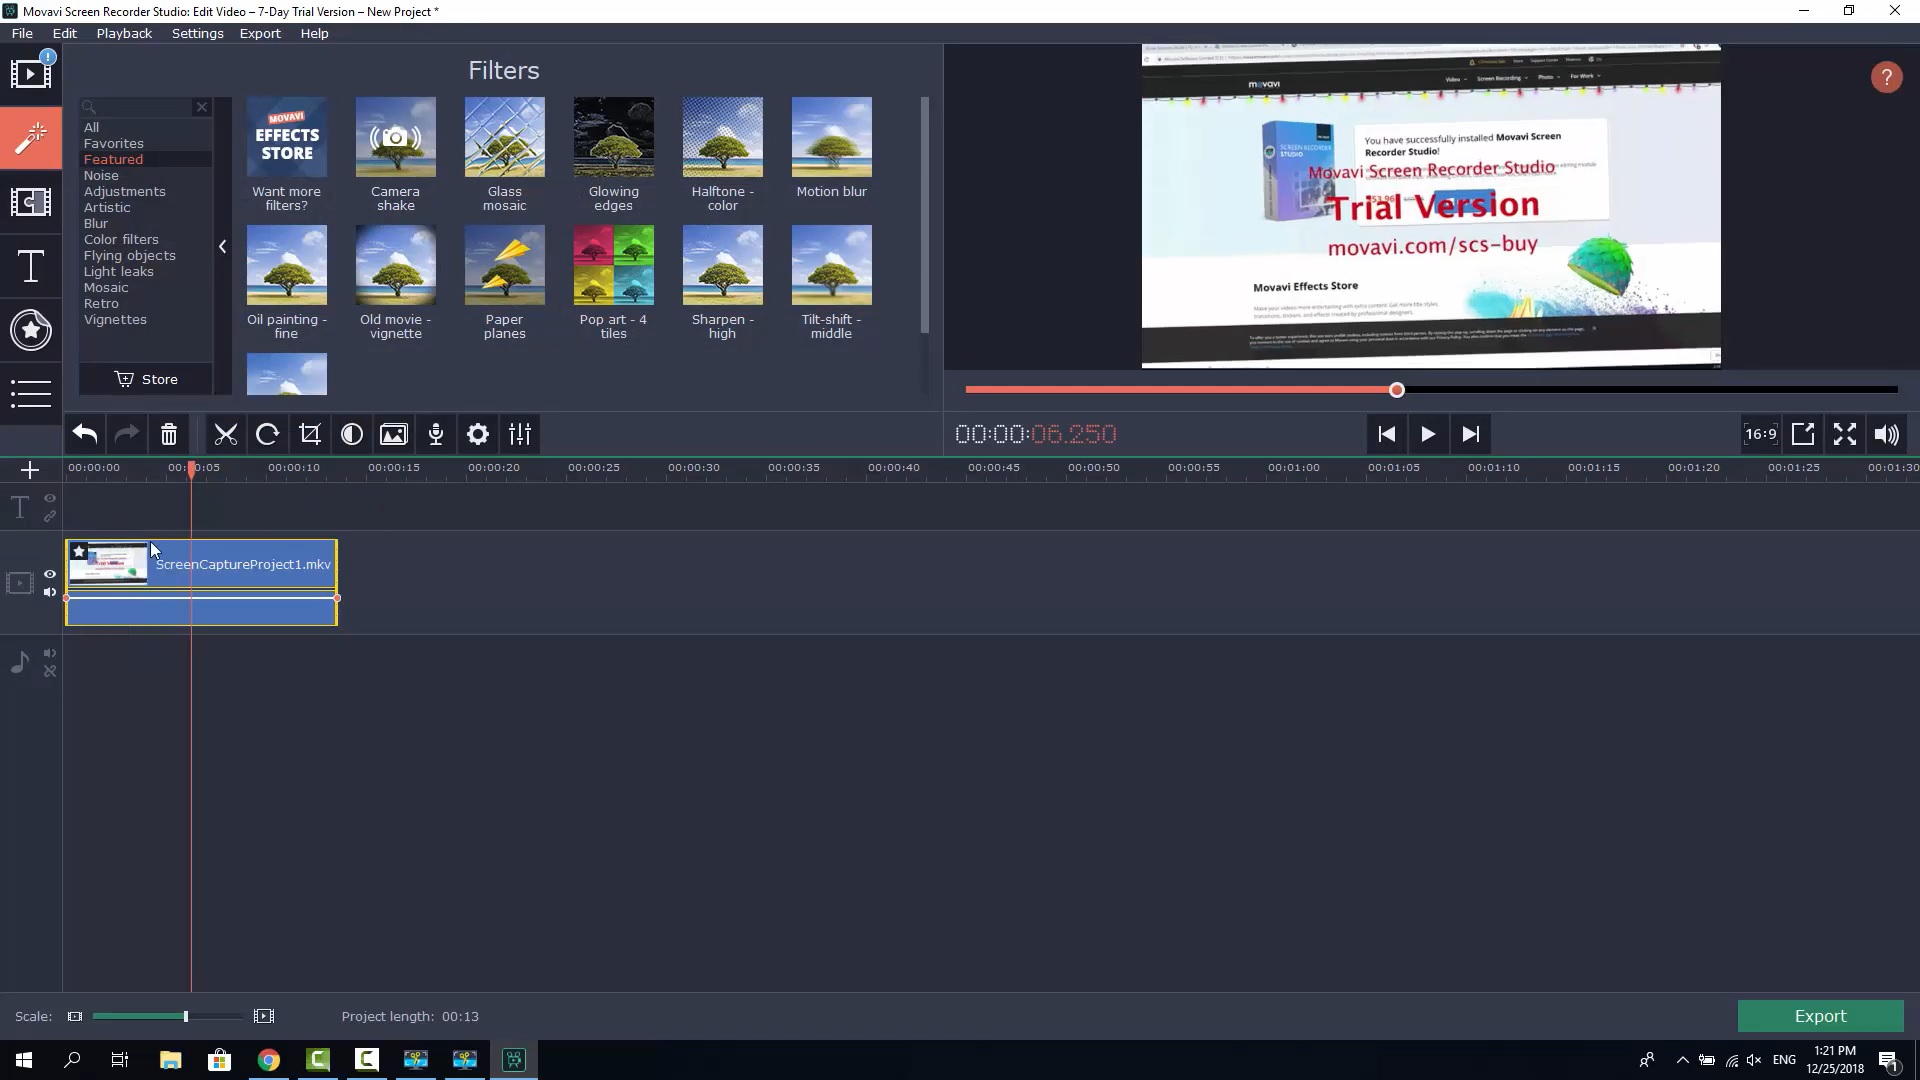
Custom Recording Area: Select the exact area of your screen you want to record, whether its a specific window or a custom-sized rectangle. Audio Recording: Capture system sounds, microphone input, or both to enhance your recordings. Real-Time Editing: Use the built-in editor to annotate your screen, highlight important points, or add text while recording. Schedule Recordings: Set a specific time for your recording to start and stop, perfect for capturing live streams or webinars.With Movavi Screen Recorder, youre not just limited to recording; youre empowered to create high-quality content with ease. Start your journey today and discover how simple it is to capture and share your screen!
Setting Up Recording Preferences
Before you start capturing your screen, it's essential to configure your recording preferences to ensure that the output meets your expectations. Heres a step-by-step guide to help you set up your recording preferences effectively using Movavi Screen Recorder.
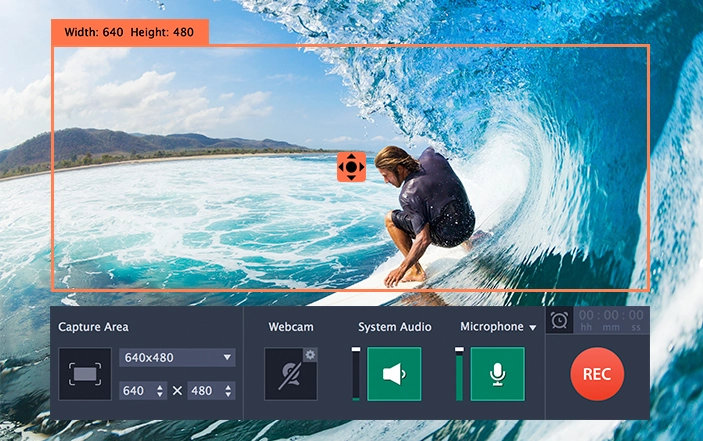
Choosing the Recording Area
The first step in setting up your recording is to define the area you want to capture. Movavi Screen Recorder offers several options:
Full Screen: This mode captures everything that is displayed on your screen. Custom Area: You can manually select a specific area by dragging the selection box to cover the desired region. Around the Cursor: This option focuses the recording around your mouse cursor, which is particularly useful for tutorials and presentations.Adjusting Audio Settings
To enhance the quality of your recording, you can adjust the audio settings:
System Audio: Enable this to capture sounds from your computer, such as music or system notifications. Microphone Audio: If you need to record your voiceover or any external sounds, make sure to adjust the microphone volume and test the input levels.By carefully setting up these preferences, you can ensure that your recordings are professional and tailored to your needs. Remember to save your settings for future recordings to maintain consistency.
Starting a Screen Recording
Welcome to the world of effortless screen capturing with Movavi Screen Recorder! Whether you're looking to record a tutorial, gameplay, or a video call, our user-friendly interface ensures that you can start recording your screen in just a few simple steps.
Step 1: Launch Movavi Screen Recorder
Begin by launching the Movavi Screen Recorder application on your computer. Once the program opens, you'll be greeted with a straightforward dashboard that provides easy access to all the recording tools you'll need.
Step 2: Configure Your Recording Settings
Before you start recording, take a moment to configure your settings. You can choose to record the entire screen or select a specific area. Adjust the audio settings to capture system sounds, microphone input, or both. Movavi Screen Recorder also allows you to set a schedule for your recordings, making it perfect for capturing live streams or webinars.
With everything set up, click on the 'REC' button to start your screen recording. A countdown will prompt you to prepare for the recording. Once the recording begins, you can pause or stop it at any time using the on-screen controls. After recording, you can preview your video and save it in your preferred format.
That's it! With Movavi Screen Recorder, starting a screen recording is quick, easy, and efficient. Capture your screen like a pro and share your recordings with ease.
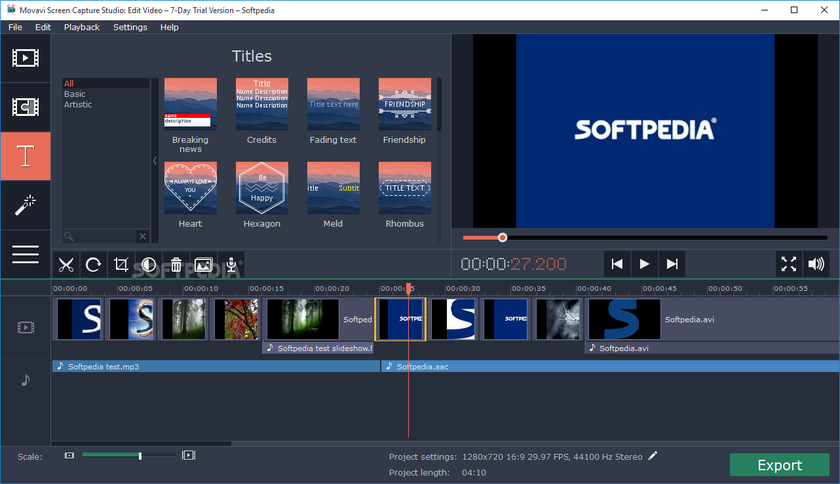
Saving and Sharing Your Recording
Once you've captured your screen with Movavi Screen Recorder, the next step is to save and share your recording. Whether you want to keep it for personal use, upload it to a video platform, or send it via email, Movavi makes it easy to manage your recordings efficiently.
Saving Options
Movavi Screen Recorder offers a variety of formats to save your recordings:
MP4: Ideal for web sharing and most devices. AVI: Offers high-quality video with larger file sizes. MOV: Compatible with Apple devices and software. GIF: Perfect for creating animated images.You can also choose the resolution and bitrate to optimize file size and quality according to your needs.
Sharing Your Recording
After saving your recording, sharing it is just as straightforward:
Direct Upload: Use the built-in upload feature to directly share your video to YouTube, Google Drive, or Dropbox. Email: Attach your recording to an email and send it to your contacts. Social Media: Share your video on platforms like Facebook, Twitter, and Instagram directly from the application.Movavi Screen Recorder ensures that your content is easily accessible and shareable, making it a versatile tool for both personal and professional use.