
Tenorshare 4DDiG Data Recovery (Activation number included)
Last Updated:20-07-2024, 09:47
tenorshare 4ddig -windows data recovery

About
tenorshare 4ddig -windows data recovery
Tenorshare 4DDig - Windows Data Recovery Tenorshare 4DDig - Windows Data Recovery: A Comprehensive GuideIn the digital age, data is invaluable. Whether it's personal memories, important documents, or critical business files, losing data can be a nightmare. Fortunately, data recovery software like Tenorshare 4DDig - Windows Data Recovery offers a lifeline. This article delves into the features, usage, and benefits of Tenorshare 4DDig, providing a detailed overview to help you recover lost data effectively.
Introduction to Tenorshare 4DDig - Windows Data Recovery
Tenorshare 4DDig - Windows Data Recovery is a powerful software designed to retrieve lost, deleted, or inaccessible data from Windows-based computers. Whether you've encountered a system crash, accidental deletion, or formatting error, 4DDig offers a robust solution to recover your precious data. This section introduces the software, its capabilities, and its user interface.
Key Features of Tenorshare 4DDig
Tenorshare 4DDig boasts a range of features that make it a standout choice for data recovery. These include:
Deep Scan: Performs an in-depth scan of your storage devices to locate and recover lost data. Preview Function: Allows you to preview recoverable files before proceeding with the recovery process. Support for Various File Types: Supports recovery of photos, videos, documents, emails, and more. User-Friendly Interface: Features an intuitive interface that makes it easy for users of all skill levels to navigate. Multiple Recovery Scenarios: Handles data loss due to deletion, formatting, virus attacks, system crashes, and more.System Requirements
To ensure smooth operation, Tenorshare 4DDig has specific system requirements. These include:
Operating System: Windows 11/10/8.1/8/7/Vista/XP Processor: 1 GHz (32-bit or 64-bit) Memory (RAM): 256 MB or more Free Hard Disk Space: 200 MB or more Display: 1024 x 768 resolutionGetting Started with Tenorshare 4DDig
This section guides you through the initial setup and installation process of Tenorshare 4DDig. It also covers the basic steps to initiate a data recovery session.
Installation Process
Installing Tenorshare 4DDig is straightforward. Follow these steps:
Download the Tenorshare 4DDig installer from the official website. Run the installer file and follow the on-screen instructions. Choose the installation directory and complete the installation. Launch the software to begin using it.Initial Setup and Configuration
After installation, you may need to configure a few settings to optimize the software's performance. Hereâs how:
Open Tenorshare 4DDig. Navigate to the settings menu. Adjust settings such as scan depth, file preview options, and recovery preferences. Save the settings and return to the main interface.Using Tenorshare 4DDig for Data Recovery
This section provides a step-by-step guide on how to use Tenorshare 4DDig to recover lost data. It covers various scenarios and best practices for effective data recovery.
Selecting the Recovery Mode
Tenorshare 4DDig offers different recovery modes tailored to specific data loss scenarios. Hereâs how to select the appropriate mode:
Launch Tenorshare 4DDig. Choose between modes like "Deleted Recovery," "Lost Partition Recovery," or "Deep Recovery" based on your situation. Select the drive or partition from which you want to recover data. Click "Scan" to start the recovery process.Scanning for Lost Data
The scanning process is crucial for locating lost data. Hereâs how to perform a scan:
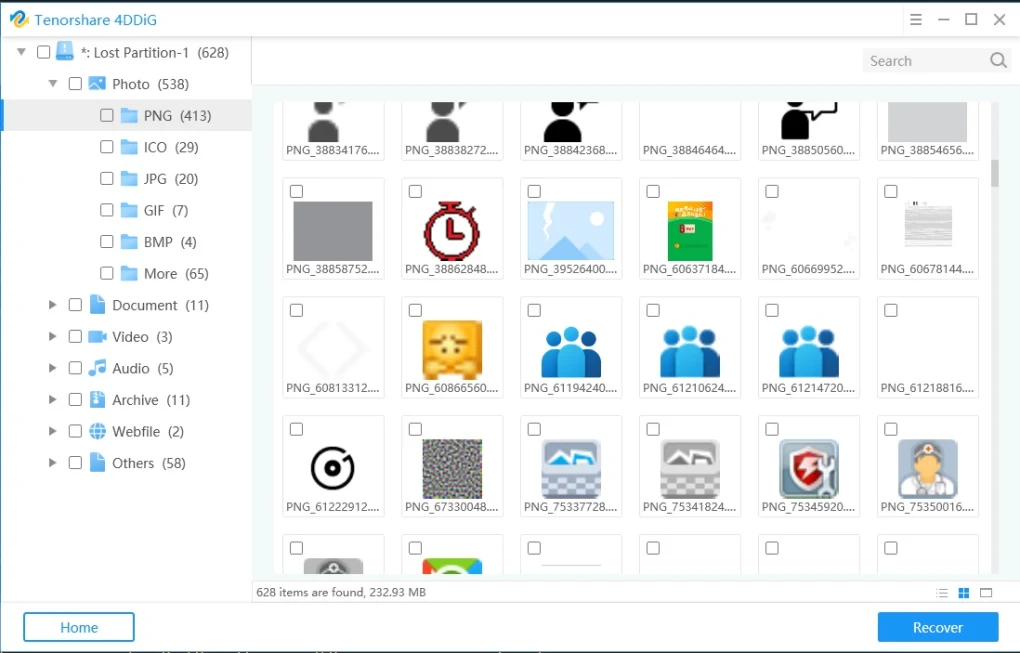
After selecting the recovery mode and drive, click "Scan." Wait for the software to complete the scan. This may take several minutes depending on the size of the drive and the amount of data. Review the scan results, which display recoverable files categorized by type.Previewing and Recovering Files
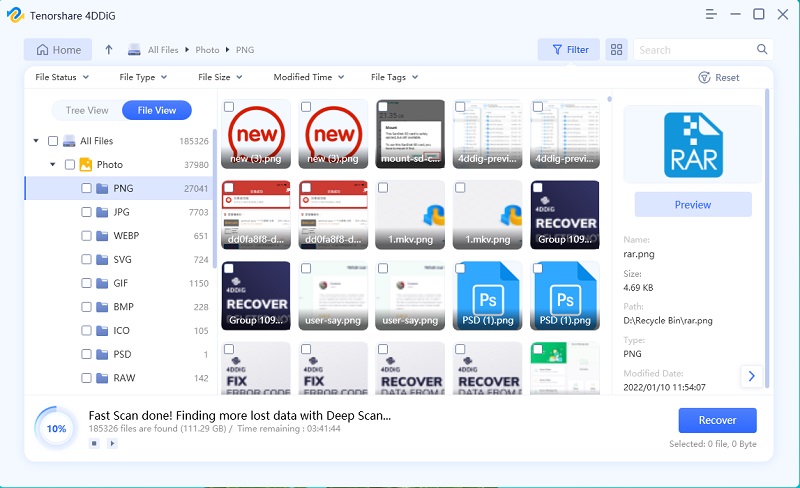
Before recovering files, itâs advisable to preview them to ensure their integrity. Hereâs how:
In the scan results, select the files you want to recover. Use the preview function to check the filesâ quality and content. Once satisfied, select the files and click "Recover." Choose a destination folder to save the recovered files and confirm the recovery.Advanced Features and Tips
Tenorshare 4DDig offers advanced features that can enhance your data recovery experience. This section explores these features and provides tips for maximizing the softwareâs potential.
Advanced Scan Options
For complex data loss scenarios, Tenorshare 4DDig provides advanced scan options. Hereâs how to use them:
In the main interface, select "Advanced Scan." Choose the specific file types you want to recover. Select the drive and start the advanced scan. Review the detailed scan results and proceed with recovery.Creating a Disk Image
Creating a disk image can be useful for preserving the current state of your drive and facilitating future recoveries. Hereâs how:
In the main interface, select "Create Disk Image." Choose the drive you want to image. Select a destination folder to save the disk image. Start the imaging process and wait for it to complete.Tips for Effective Data Recovery
To ensure successful data recovery, follow these tips:
Act Quickly: The sooner you attempt recovery, the higher the chances of success. Avoid Writing Data: Do not save new data to the affected drive to prevent overwriting lost files. Regular Backups: Regularly back up your data to avoid data loss in the first place. Use a Reliable Power Supply: Ensure your system has a stable power supply to avoid interruptions during recovery.Troubleshooting Common Issues
Despite its robustness, users may encounter issues while using Tenorshare 4DDig. This section addresses common problems and provides solutions to troubleshoot them.
Scanning Issues
If the software fails to scan or takes too long, try these solutions: