
Freemake Video Converter (Activation number included)
Last Updated:8-07-2024, 00:20
How to uninstall freemake video converter
About
Are you ready to bid farewell to Freemake Video Converter? Whether you're switching to a different software or simply need to clean up your system, this guide will walk you through the process of uninstalling Freemake Video Converter quickly and efficiently.
Follow these simple steps to ensure a smooth removal:
Understanding Freemake Video Converter
Freemake Video Converter is a versatile tool designed to convert video files into various formats, suitable for different devices and platforms. Whether you're looking to convert videos for your smartphone, tablet, or PC, Freemake offers a range of features that cater to both beginners and advanced users.
Key Features of Freemake Video Converter
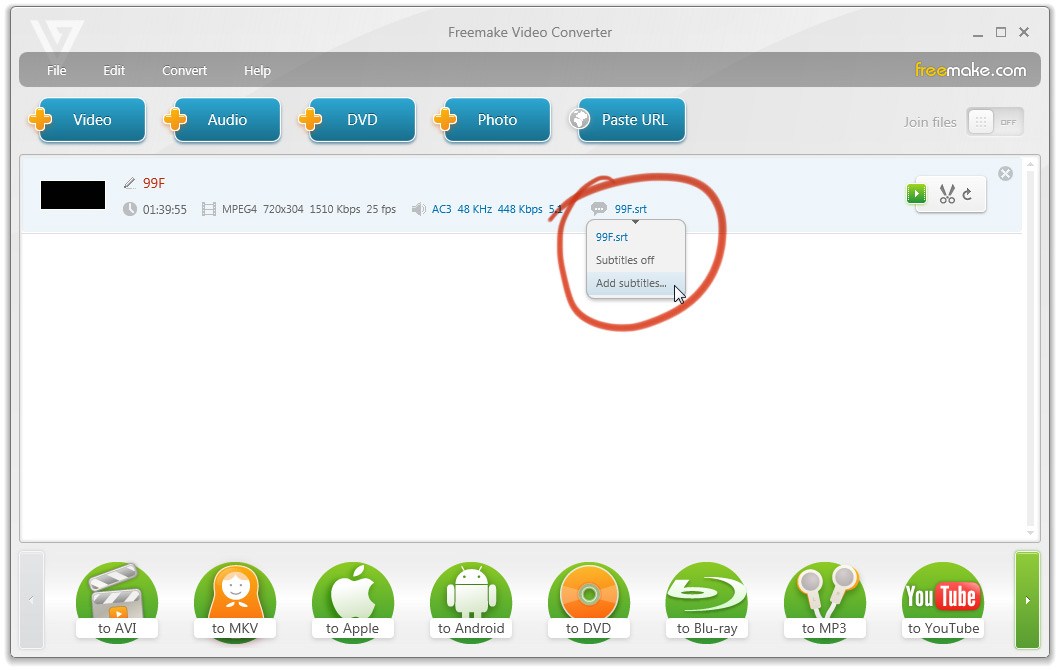
Multiple Format Support: Freemake supports over 500 input formats, including MP4, AVI, MKV, and more. It can output files in formats compatible with devices like iPhones, Androids, and gaming consoles. Video Editing Capabilities: With Freemake, you can trim, rotate, and crop videos directly within the application. It also allows you to add subtitles and adjust video quality settings. Integration with YouTube: You can upload videos directly to YouTube from the converter, making it a convenient tool for content creators. Burn to DVD/Blu-ray: Freemake enables you to create DVDs and Blu-ray discs with custom menus, perfect for preserving home videos or creating professional-looking presentations.Steps to Uninstall Freemake Video Converter
Open Control Panel: Navigate to your computer's Control Panel and select 'Programs and Features'. Select Freemake Video Converter: Find Freemake Video Converter in the list of installed programs and click on it. Uninstall: Click the 'Uninstall' button. Follow the on-screen instructions to complete the uninstallation process. Delete Remaining Files: After uninstalling, check your C:Program Files and C:ProgramData directories to ensure no leftover files remain.Understanding how Freemake Video Converter works and how to manage its installation and uninstallation can help you make the most of its features while keeping your system clean and efficient.
Why Uninstall Freemake Video Converter?
Freemake Video Converter is a popular tool for converting videos, but there are several reasons why users might consider uninstalling it. Below, we explore some of the key reasons that could prompt you to remove this software from your system.
Performance Issues
One of the primary reasons users uninstall Freemake Video Converter is due to performance issues. The software can sometimes consume significant system resources, leading to slower computer performance. This can be particularly frustrating for users with older or less powerful systems. Here are some specific performance-related issues:
High CPU usage during conversion tasks Increased memory consumption Slower overall system responsivenessAdware and Bundled Software
Another significant concern with Freemake Video Converter is the presence of adware and bundled software. Many users find this intrusive and prefer to use software that does not include such features. Here are some points to consider:
Unwanted toolbars and browser extensions Pop-up ads during installation and usage Potential security risks associated with bundled softwareConsidering these factors, uninstalling Freemake Video Converter might be a prudent decision to ensure a smoother and more secure computing experience.
Pre-Uninstall Checklist
Before you proceed with uninstalling Freemake Video Converter, it's important to ensure that you've completed a few essential steps to avoid any data loss or system issues.
1. Backup Your Projects: Make sure to save any ongoing video projects or edits. Export them to a different location or cloud storage to ensure they are not lost during the uninstallation process.
2. Remove Associated Files: Check your computer for any files or folders created by Freemake Video Converter. Typically, these are found in the program files directory or your personal documents. Move or delete these files if they are no longer needed.
3. Deauthorize the Software: If Freemake Video Converter requires authorization or has a deactivation option, use it before uninstalling. This step ensures that your license can be used on another device if needed.
4. Check for Updates: Before uninstalling, check if there are any updates available for Freemake Video Converter. Sometimes, the latest update might include fixes for uninstallation issues.
5. Review Installed Add-ons: If Freemake Video Converter has installed any browser extensions or add-ons, consider removing them separately through your browser settings to ensure a clean uninstall.
Completing this checklist will help you ensure a smooth and hassle-free uninstallation process, maintaining the integrity of your system and data.
Steps to Uninstall Freemake Video Converter on Windows
Step 1: Close Freemake Video Converter
Before you begin the uninstallation process, make sure that Freemake Video Converter is not running. You can do this by checking the taskbar and the system tray for any open instances of the program. If it is open, close it by clicking on the program window and selecting Exit or by using the task manager.
Step 2: Access the Control Panel
Open the Control Panel on your Windows system. You can do this quickly by typing Control Panel in the search bar next to the Start button and selecting it from the list of results. Alternatively, you can open it through the Settings app under the System category.
Step 3: Choose 'Programs and Features'
In the Control Panel, navigate to 'Programs and Features'. This is where you can see a list of all the installed programs on your computer. Look for 'Freemake Video Converter' in the list.
Step 4: Uninstall the Program
Once you have located 'Freemake Video Converter' in the list, click on it to select it. Then, click on the 'Uninstall' button at the top of the list. You might be prompted to confirm the uninstallation; click 'Yes' to proceed.
Step 5: Follow the Uninstallation Wizard
The uninstallation process will start, and you will be guided through the steps by an uninstallation wizard. Follow the on-screen instructions to complete the process. This may include prompts to remove any associated files or settings.
Step 6: Restart Your Computer
After the uninstallation is complete, it is recommended to restart your computer. This ensures that all remnants of the program are properly removed from your system. After restarting, you can verify that Freemake Video Converter has been successfully uninstalled by checking the 'Programs and Features' list again.
Note: If you encounter any issues during the uninstallation process, consider using a dedicated uninstaller tool or contacting Freemake support for assistance.
Uninstalling Freemake Video Converter on Mac
Step 1: Locate the Application
Begin by navigating to the Applications folder on your Mac. Look for the Freemake Video Converter app icon.
Step 2: Move to Trash
Once you have located the Freemake Video Converter application, drag it to the Trash. Alternatively, you can right-click (or Ctrl-click) on the app and select Move to Trash.
Step 3: Empty the Trash
To ensure that the application is completely removed from your system, empty the Trash. You can do this by right-clicking on the Trash icon and selecting Empty Trash. Be cautious, as this action is irreversible.
Step 4: Remove Preferences and Caches (Optional)
For a thorough cleanup, you might want to remove any leftover preferences and cache files associated with Freemake Video Converter. Open the Finder, go to Go > Go to Folder, and type ~/Library/Preferences/. Look for any files prefixed with Freemake and move them to the Trash. Repeat this step for the Caches folder: ~/Library/Caches/.
Step 5: Restart Your Mac
Finally, restart your Mac to complete the uninstallation process. This ensures that any background processes or remnants of the application are fully cleared from your system.
Post-Uninstall Cleanup
After successfully uninstalling Freemake Video Converter, it's crucial to perform a thorough cleanup to ensure that all remnants of the software are removed from your system. This not only helps in freeing up disk space but also prevents potential conflicts with other software. Hereâs a step-by-step guide to help you through the post-uninstall cleanup process:
Check for Leftover Files: Navigate to the installation directory (commonly found in C:Program FilesFreemake Video Converter or C:Program Files (x86)Freemake Video Converter). Delete any remaining files and folders associated with Freemake Video Converter. Clean the Registry: Open the Registry Editor by typing regedit in the Run dialog (Win + R). Navigate to HKEY_CURRENT_USERSoftware and HKEY_LOCAL_MACHINESOFTWARE, and delete any entries related to Freemake Video Converter. Be very cautious while editing the registry to avoid deleting important system entries. Remove Associated Shortcuts: Check your desktop, Start menu, and taskbar for any shortcuts linked to Freemake Video Converter. Delete these shortcuts to remove any traces from your user interface. Clear Temporary Files: Use the Disk Cleanup tool (accessible from the System Tools in the Control Panel) to remove temporary files and system junk that might be associated with Freemake Video Converter. Restart Your Computer: After completing all the above steps, restart your computer to ensure that all changes take effect and any lingering processes are terminated.By following these steps, you can ensure a clean and thorough removal of Freemake Video Converter from your system, enhancing its performance and stability.
Alternative Video Converter Software
Looking for a reliable video converter to replace Freemake Video Converter? Look no further! We've compiled a list of top-notch alternatives that offer robust features, ease of use, and compatibility with various formats. Whether you're a professional editor or a casual user, these options are sure to meet your needs.
Each of these alternatives offers unique advantages, ensuring you find the perfect fit for your video conversion needs. Explore their features and start converting your videos with ease and efficiency!
Frequently Asked Questions
Q: What is Freemake Video Converter?
A: Freemake Video Converter is a popular software application designed to convert video files into various formats, as well as to rip and burn DVDs and Blu-rays. It also allows users to upload videos directly to YouTube.
Q: Why would I want to uninstall Freemake Video Converter?
A: There are several reasons why you might want to uninstall Freemake Video Converter. These include upgrading to a different software, freeing up space on your computer, or resolving issues with the current installation.
Q: Is uninstalling Freemake Video Converter difficult?
A: Uninstalling Freemake Video Converter is generally straightforward. However, the exact steps can vary depending on your operating system (Windows, Mac, etc.) and whether you use the default uninstaller or a third-party tool.
Q: Will uninstalling Freemake Video Converter delete my files?
A: No, uninstalling Freemake Video Converter will not delete your personal files. However, it will remove the program files and any associated settings from your computer.
Q: How can I ensure that all parts of Freemake Video Converter are completely removed from my system?
A: To ensure a complete removal, you can use the default uninstaller provided by your operating system and then use a registry cleaner or a dedicated uninstaller tool to remove any leftover files or registry entries.